

How To Screen Record With Internal And External Audio Iphone
Do you need to record your iPhone screen? Maybe it's a step-by-step how-to for work or a way to show your mom how to do something on her device. No matter why you need or want to record your iPhone screen, it's extremely easy to do.
This short tutorial shows you how to make an iPhone screen recording with and without sound.
Add Screen Recording to the Control Center
First things first, if you don't have the Screen Recording option in your Control Center, you can add it easily.
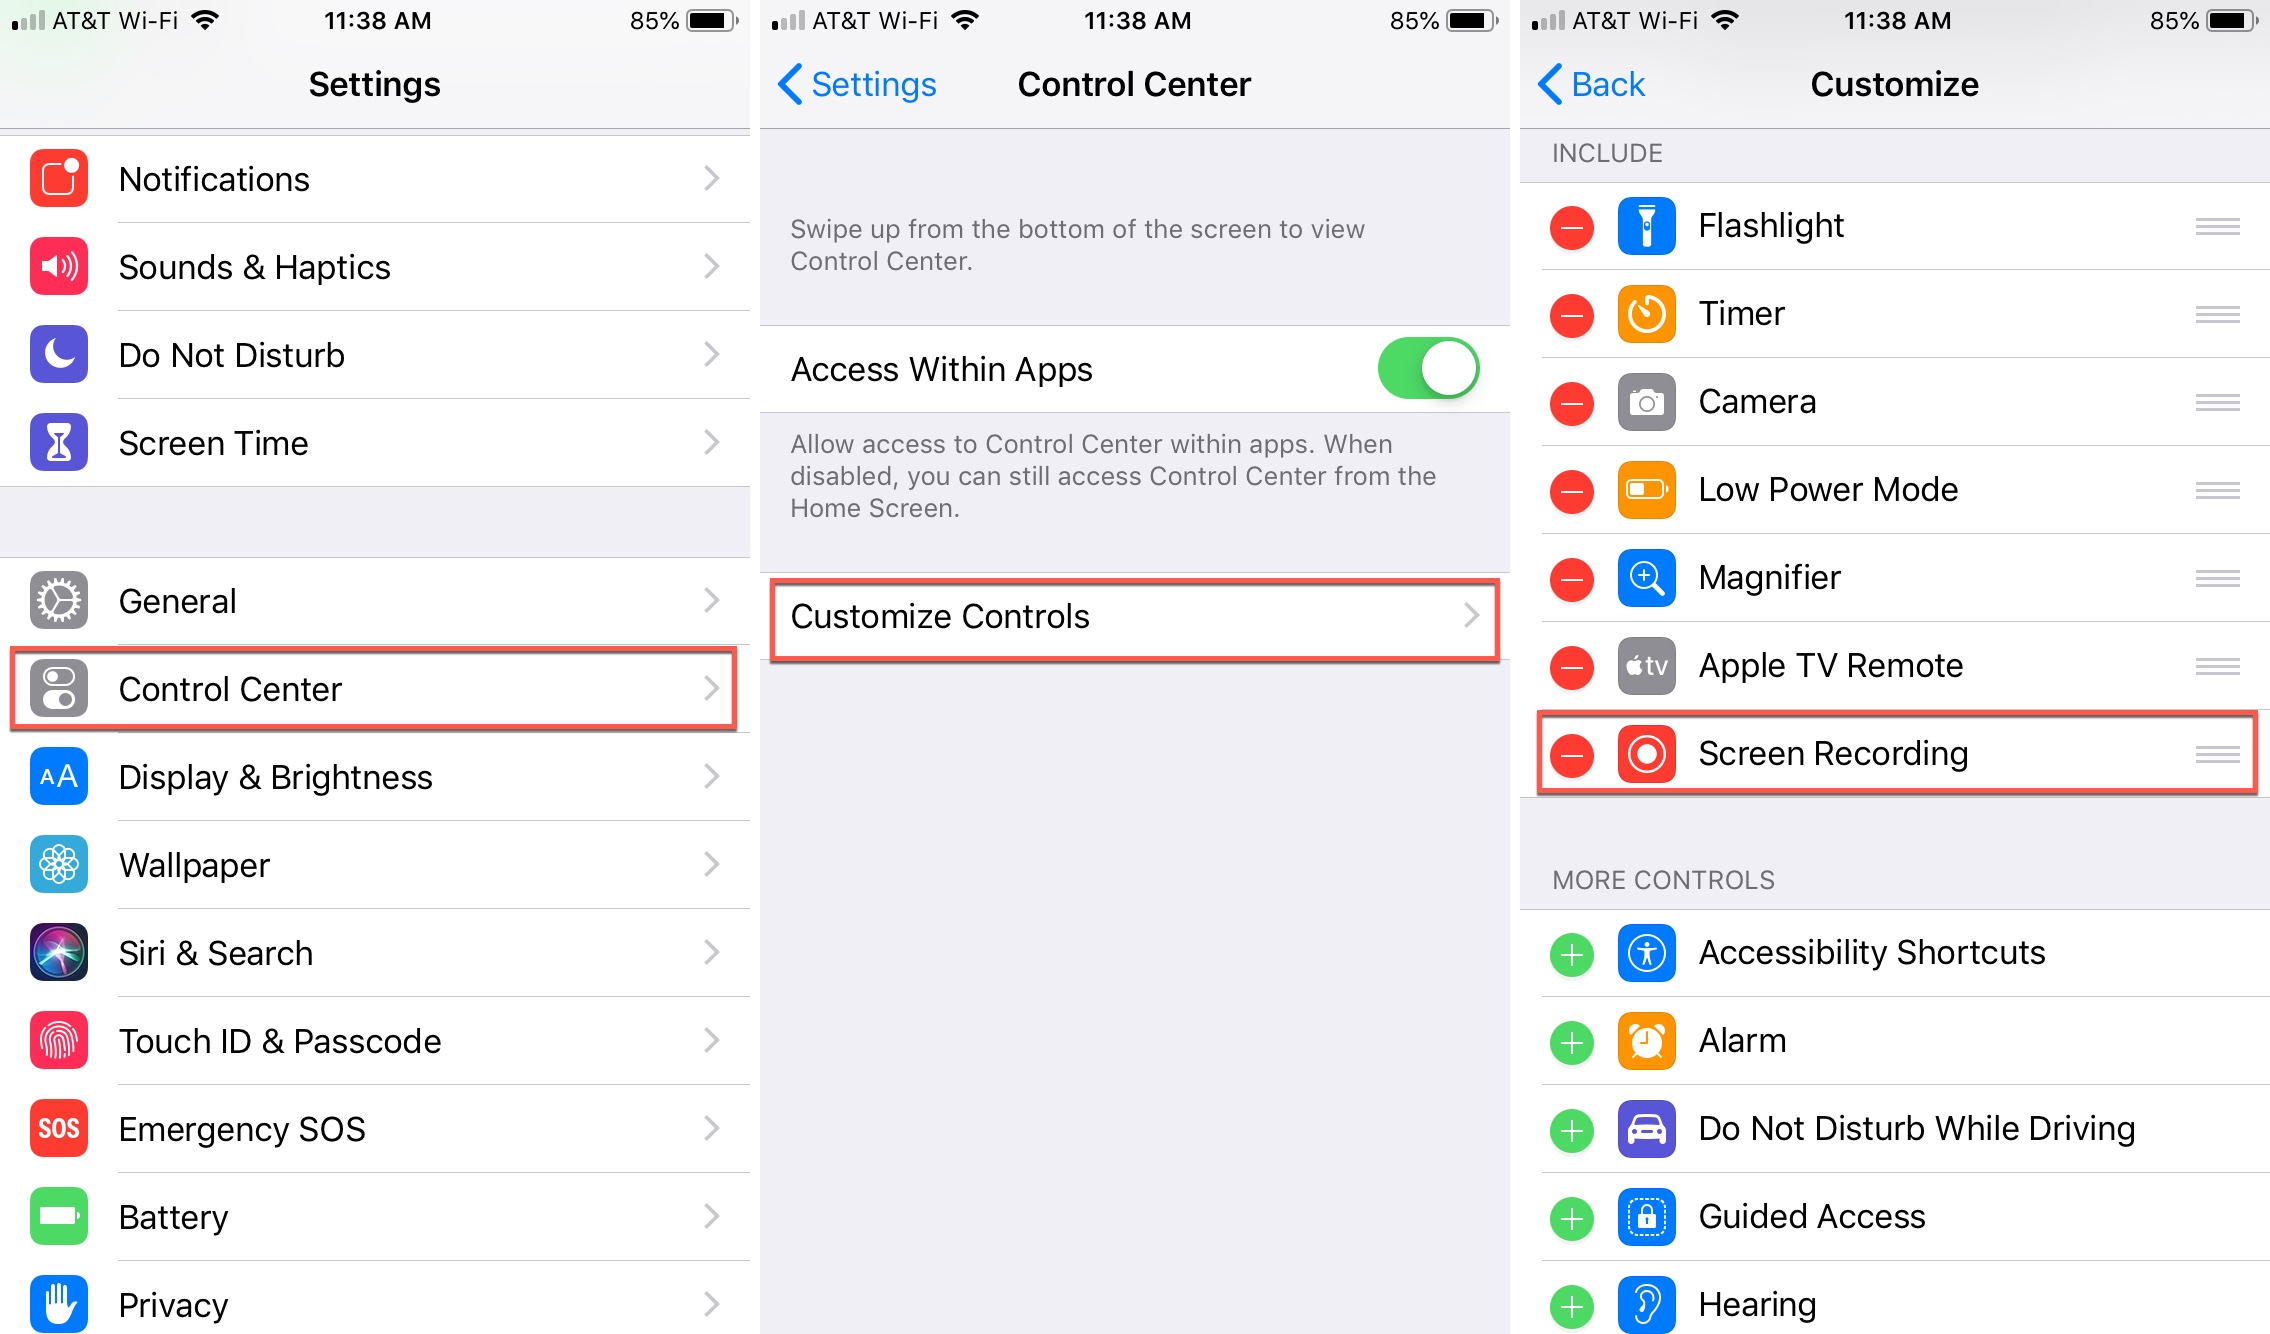
1) Open your Settings and select Control Center.
2) Tap Customize Controls.
3) Under More Controls, tap the plus sign next to Screen Recording.
Now, you will see Screen Recording at the top under Include. It's at the bottom of the list but you can drag to move it to a new spot if you like.
Make your iPhone screen recording
When you're ready to record your iPhone screen, it's simple.
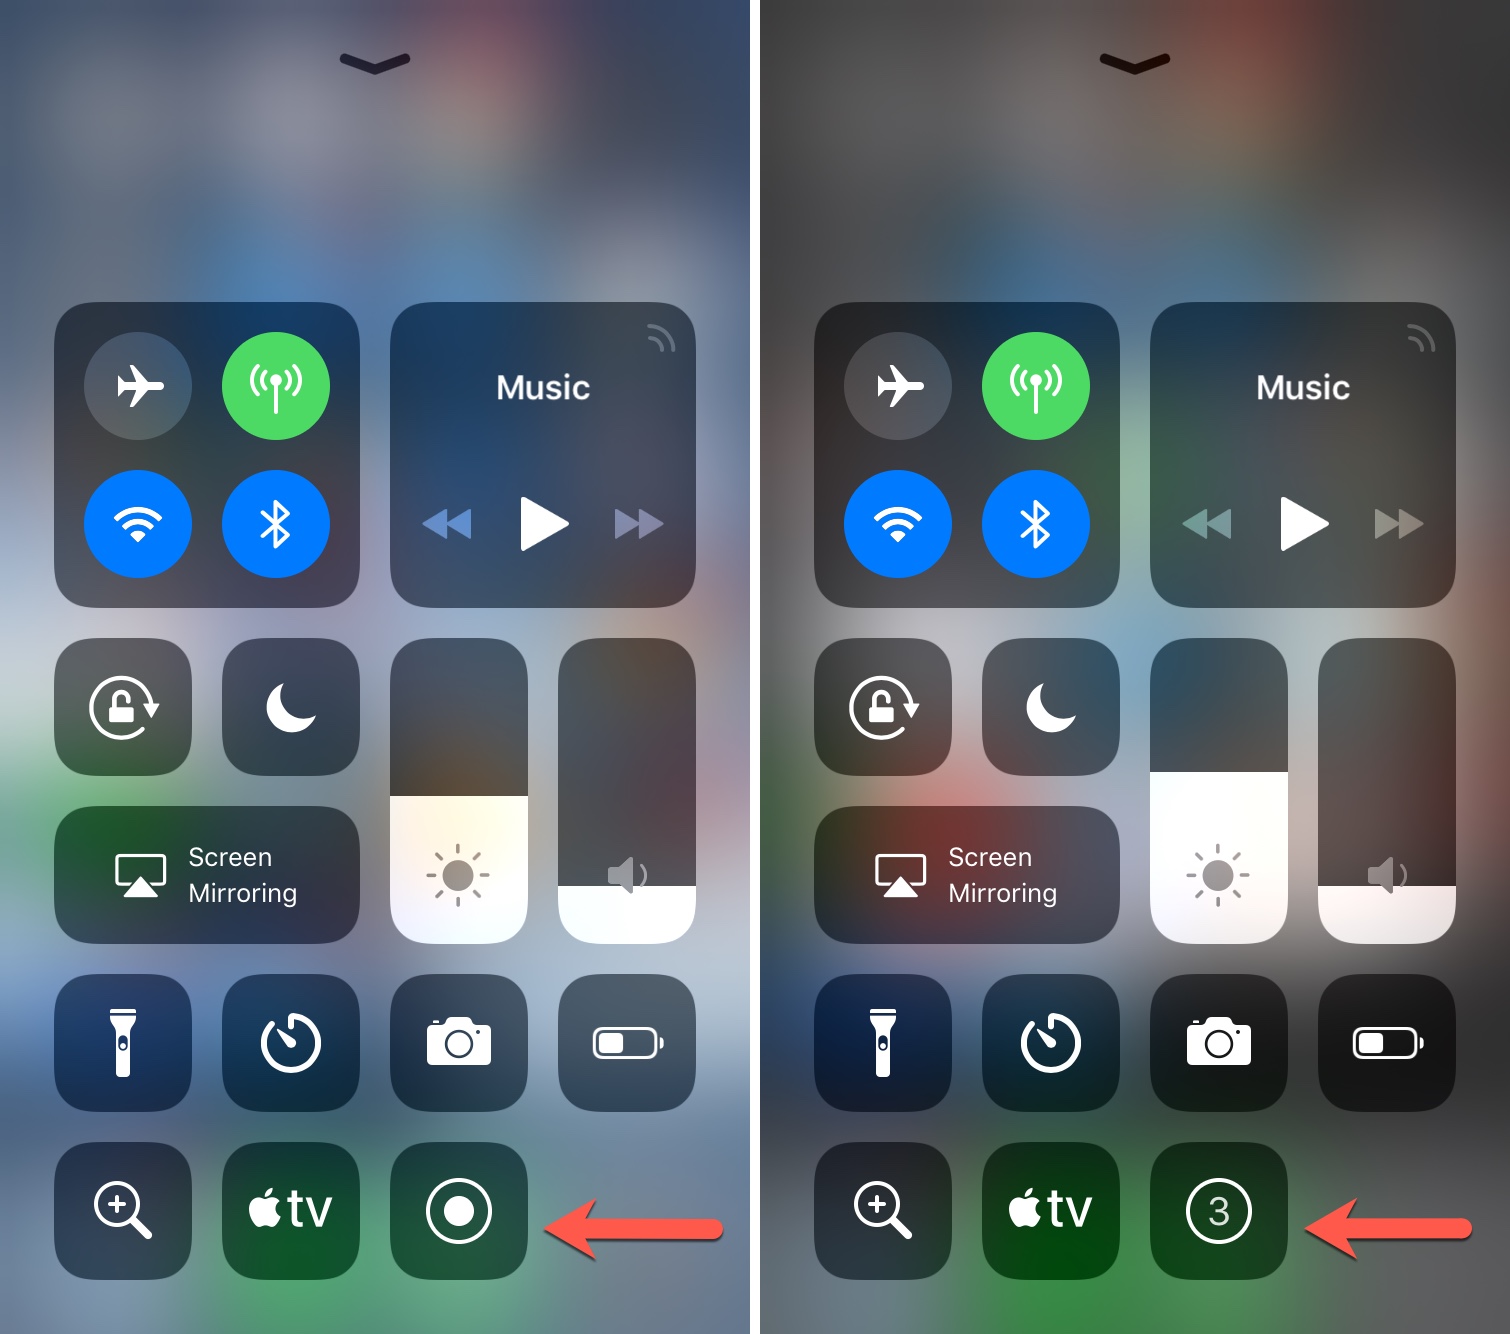
1) Slide up to access the Control Center.
2) Tap the Screen Recording button.
You will then see a countdown of three seconds on the button. This gives you a small window of time to navigate to what you want to record on your screen. So, do what you can to be ready ahead of time whether it's having an app open or moving to a different screen.
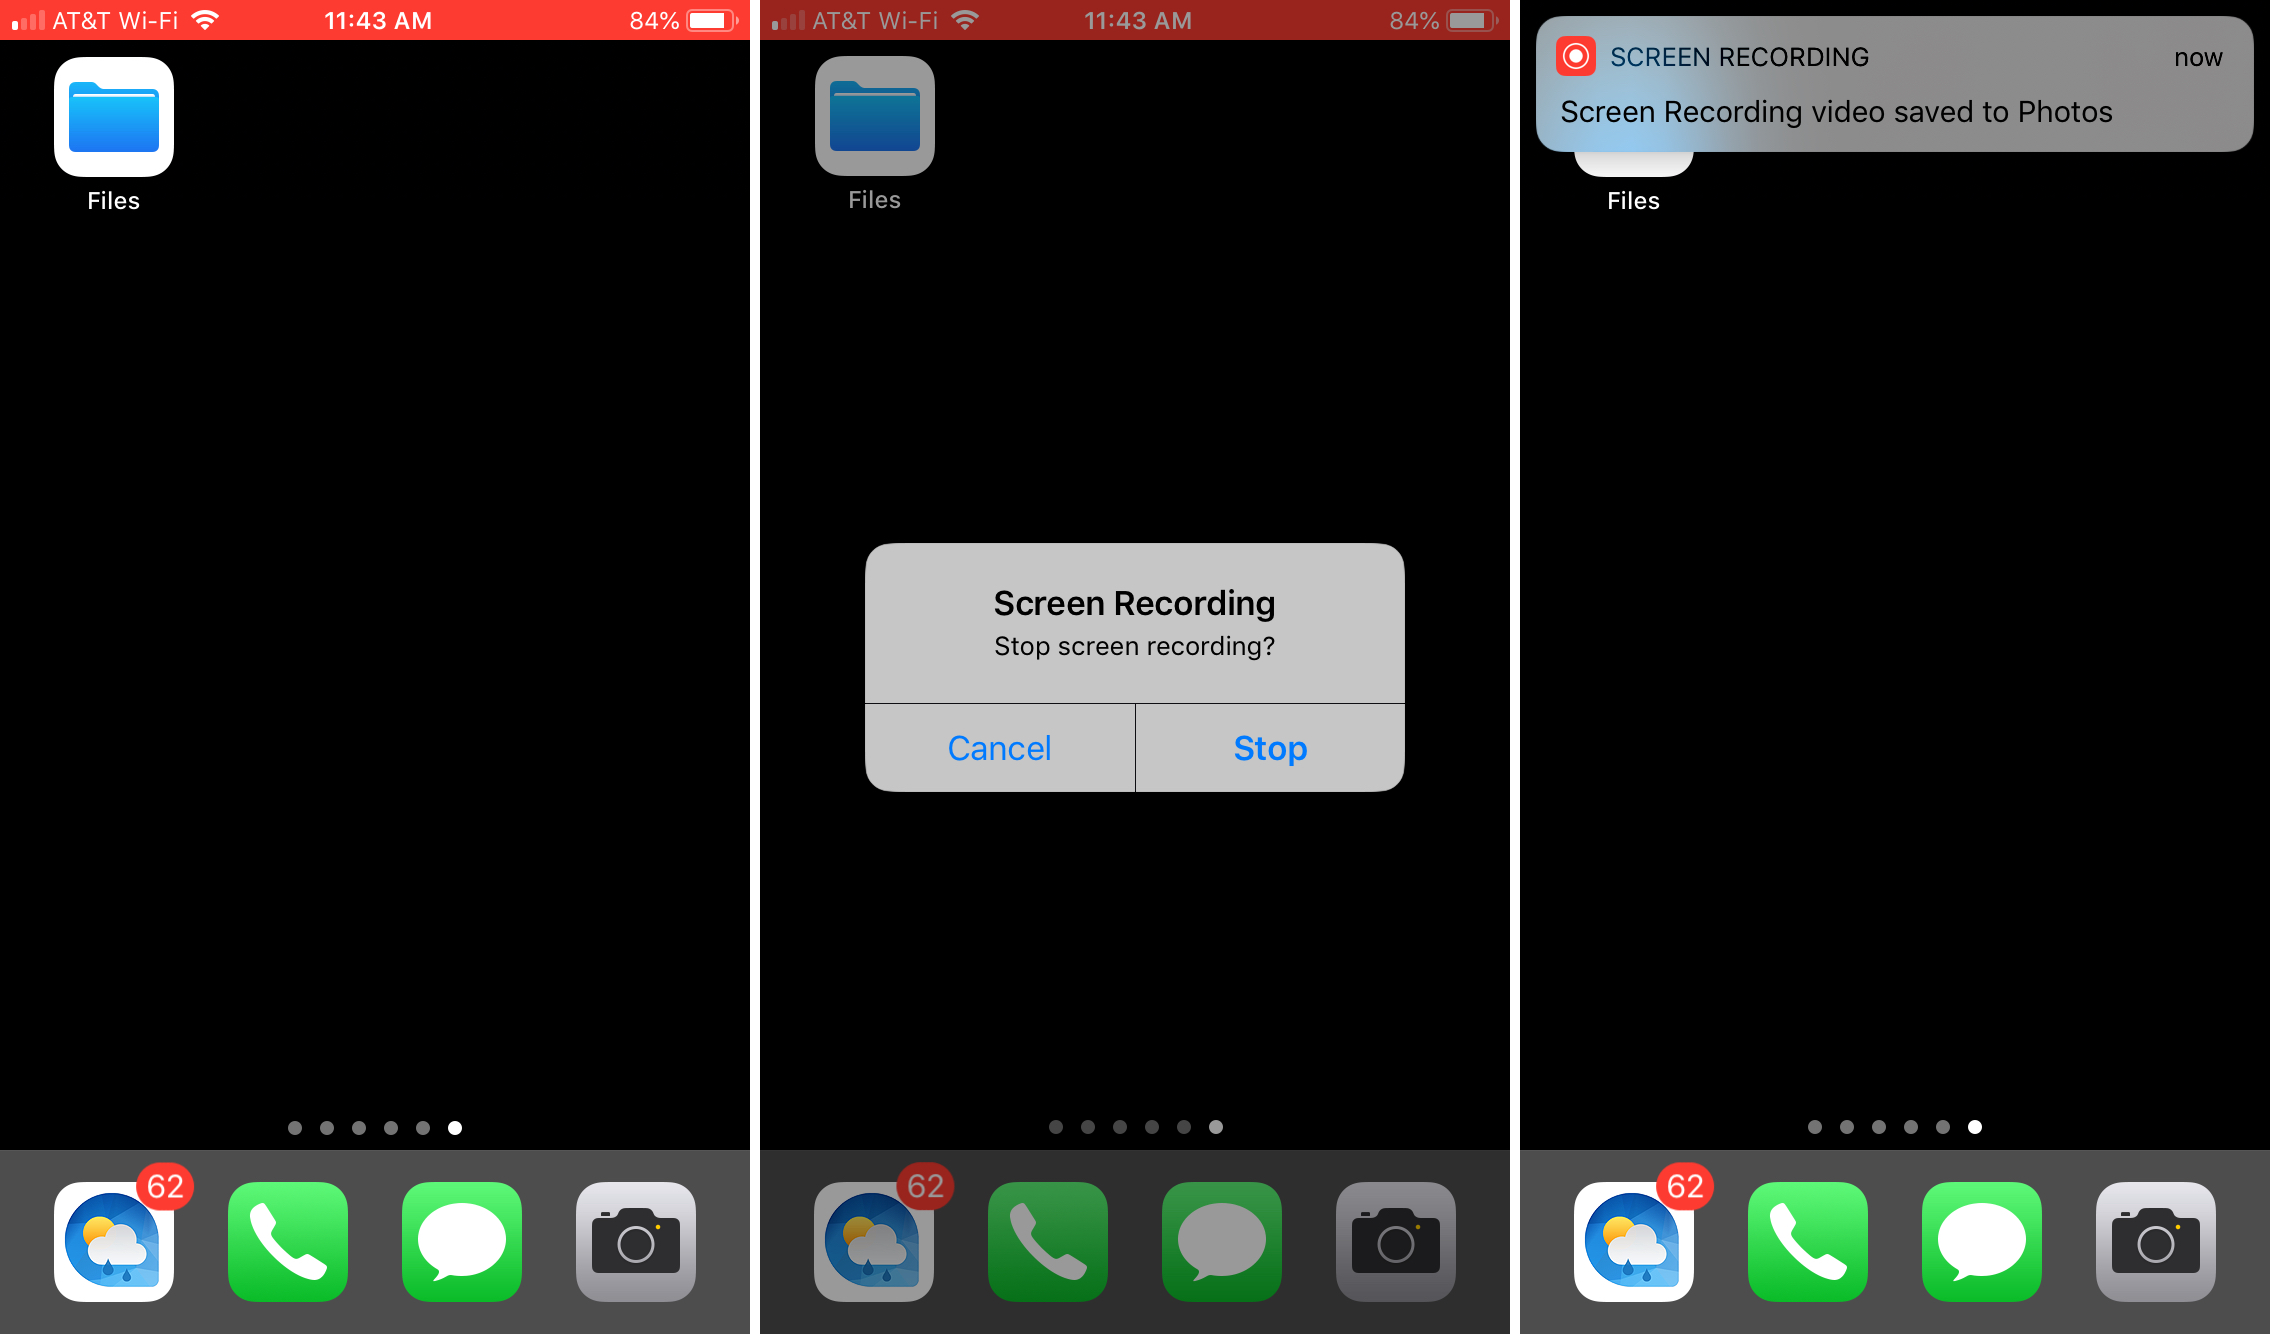
Once the recording starts, you will see a red bar across the top of your screen letting you know that it's recording. You can stop recording by simply tapping that red bar. You'll then see a confirmation to end recording, so tap Stop. If you prefer to continue recording, tap Cancel.
When you do stop recording, you'll see a brief notification that your recording is saved to Photos.
Make your iPhone screen recording with sound
Maybe you need to make a screen recording that includes audio. This is also easy to do and you have two options. You can record just the sound from your iPhone internal microphone or the sound from your iPhone as well as your external microphone.
Record both internal and external sound
This is a good way to go if you are creating a recording where you want to explain what you're doing and also bring the sounds taking place on your iPhone into the video.
1) Slide up to access the Control Center.
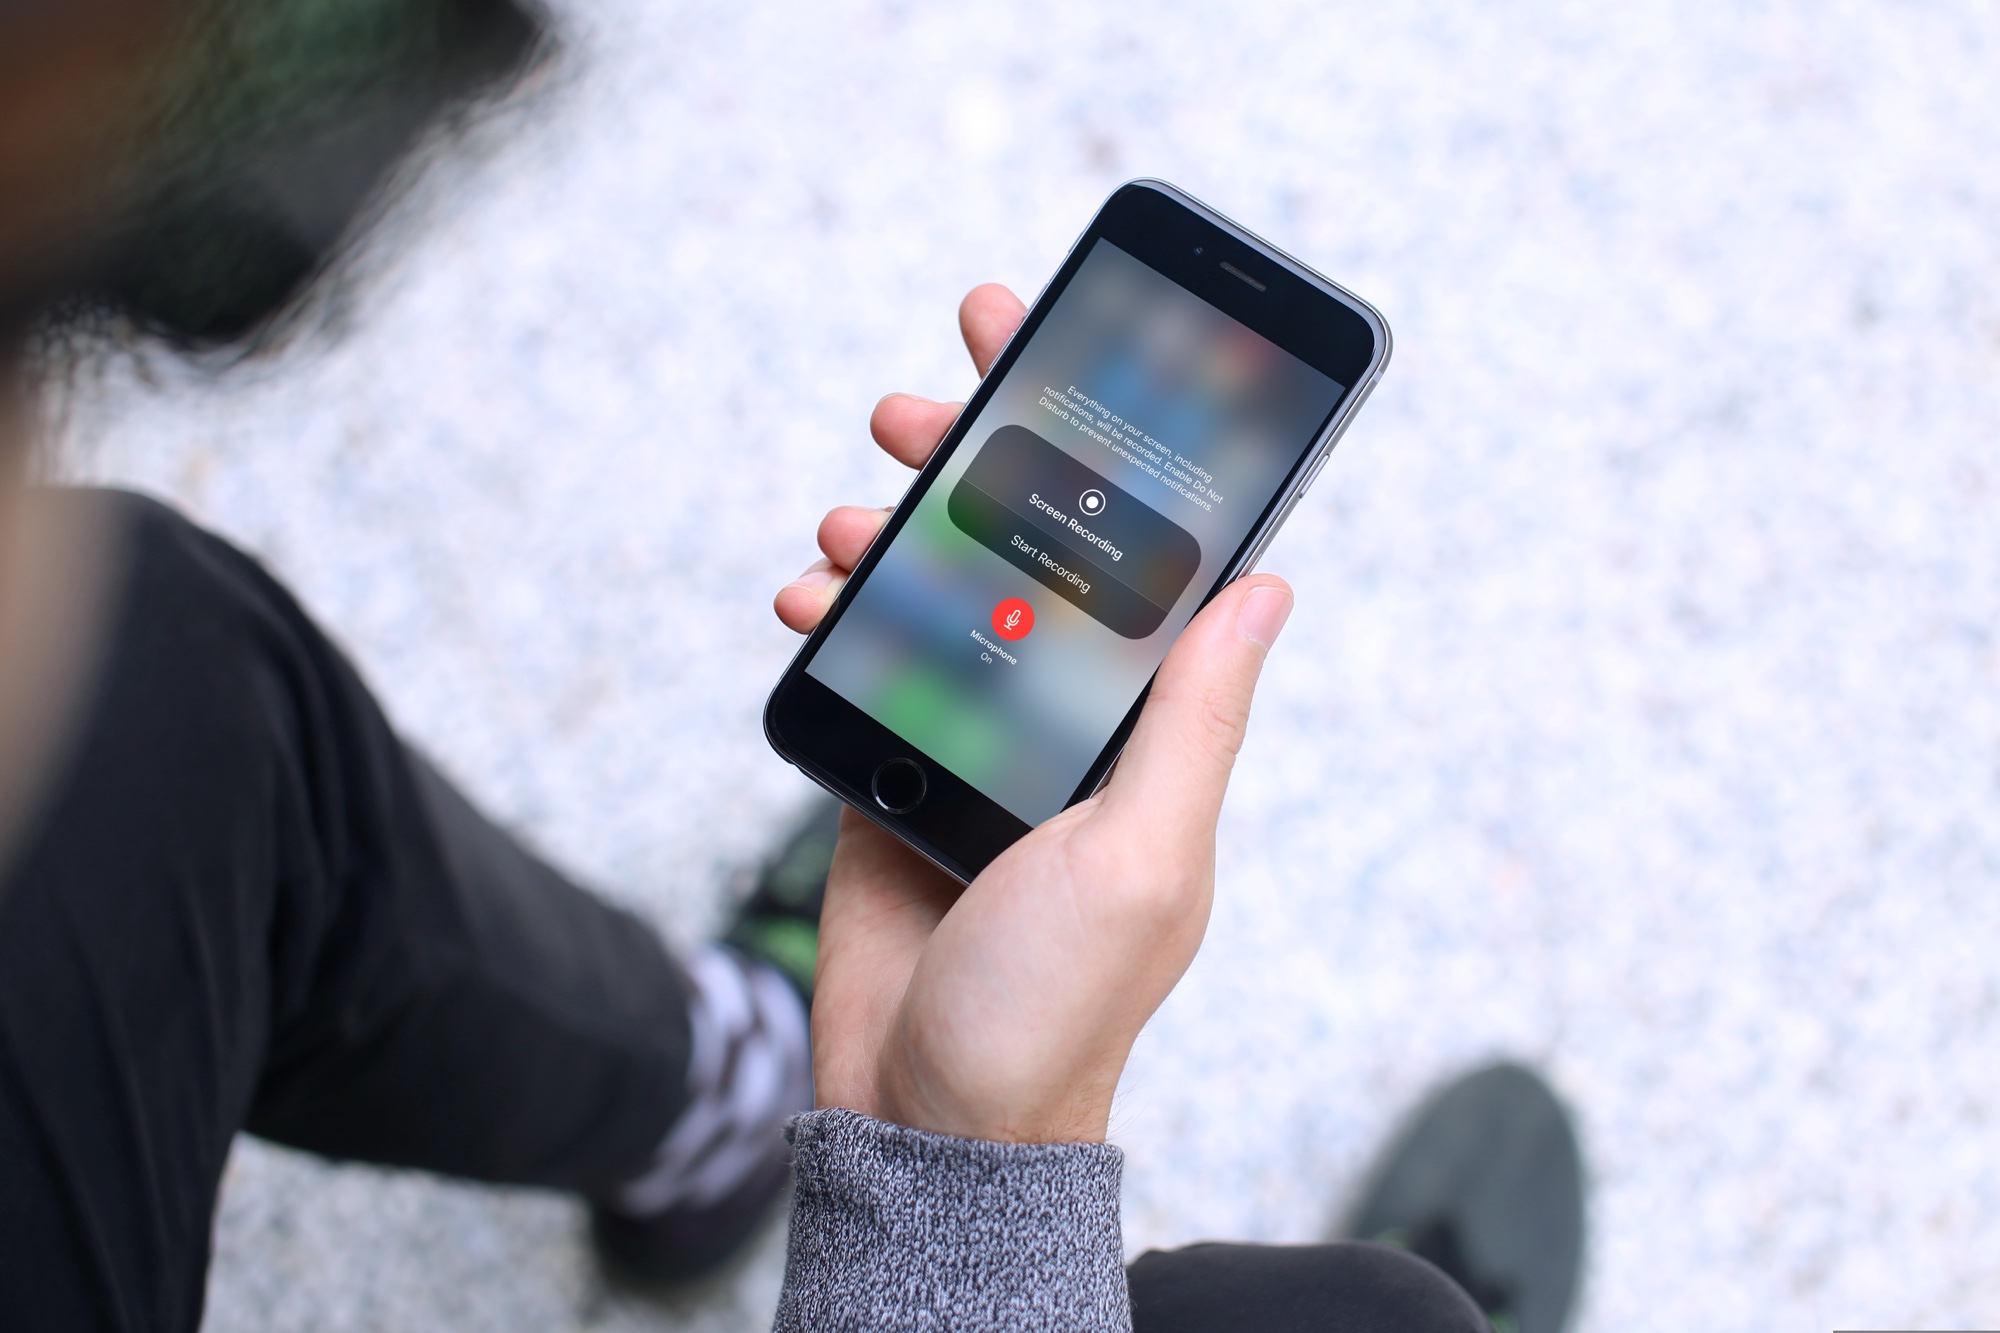
2) Press firmly (or tap and hold) the Screen Recording button.
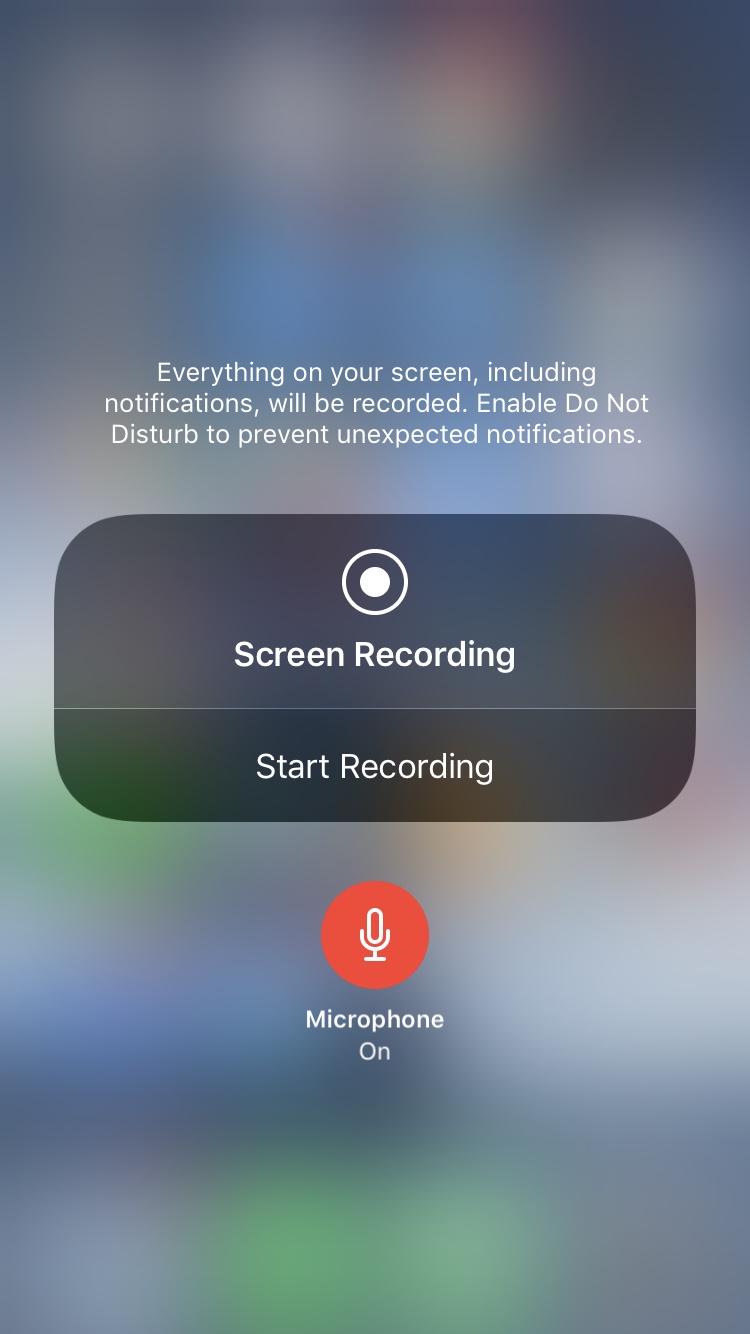
3) Tap the red microphone icon to turn On the external audio.
4) Tap Start Recording.
Record internal sound only
If you don't want any outside noise in your video and just the sounds from your iPhone, then this is the option you need.
1) Slide up to access the Control Center.
2) Press firmly (or tap and hold) the Screen Recording button.
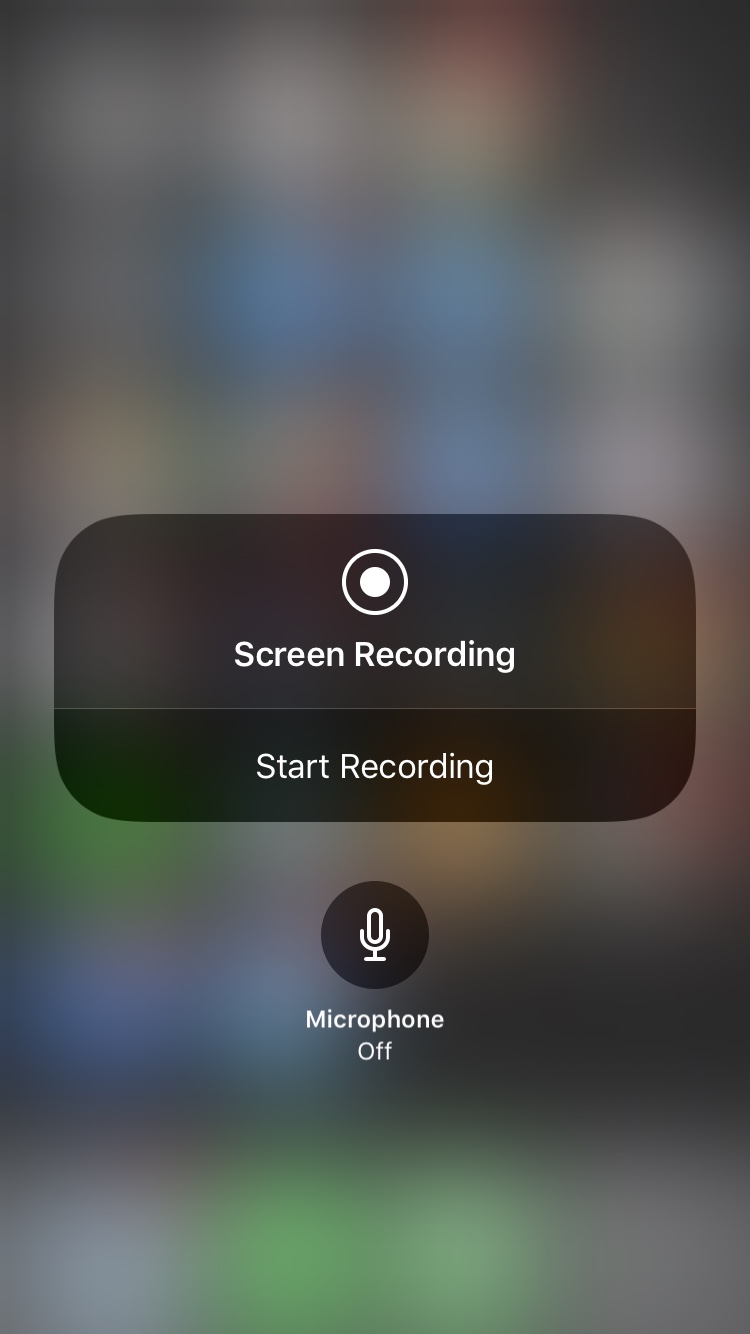
3) Tap the red microphone icon to turn Off the external audio.
4) Tap Start Recording.
Regardless of the audio option you select, you'll still see the red bar at the top, can tap and confirm to stop, and have the video saved to your Photos.
Wrapping it up
Things just get easier all the time on our Apple devices and the Screen Recordings feature is just another example. You can use it for articles, presentations, how-tos, and so much more.
For another tutorial regarding video, head over to check out how to loop a video in QuickTime on your Mac.
How To Screen Record With Internal And External Audio Iphone
Posted by: paytonthestive.blogspot.com
Source: https://www.idownloadblog.com/2018/11/23/make-iphone-screen-recording-sound/
0 Response to "How To Screen Record With Internal And External Audio Iphone"
Post a Comment